|
**TOP
COPIES**
MATERIAL
-Efeitos do PSP_9
- Plugin Mura's Meister
-Um Tube
-Um Misted
ROTEIRO
1-Abrir uma nova imagem de 1000 x 600
preencha com um Gradiente Linear - Angle=0 - Repeat=1
Invert desmarcado, formado por duas cores de sua imagem.
2-Effects > Geometric Effects > Perpective Horizontal >
98 > transpsrent.
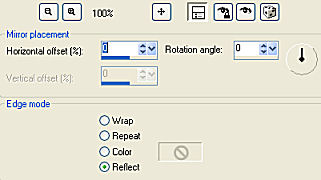
Image > Mirror
Repita novamente o efeito perdspective horizontal na
mesma configuração.
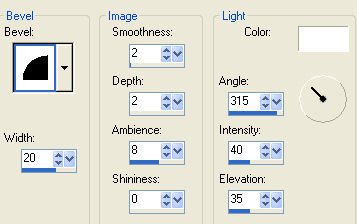
3-Effects > 3D Effects > Inner Bevel
4-
Image resize > 80%
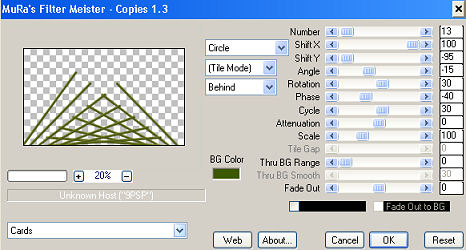
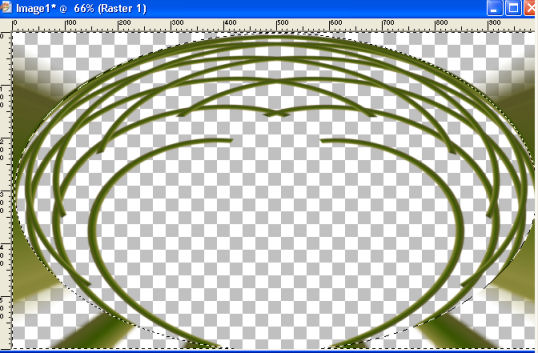
5- Plugin Mura's Meister > Copies > Cards
13/100/-95/-15/30/-40/30/0/100/0/0
6-
Effects > Reflection Effects > Rotating Mirror
7-
Effects / Distortion Effects / Polar Coordinates /
Rectangular to Polar/Repeat
8- Image > Flip
9- Acione View > rulers (régua) - Com a ferramenta
selection tool configurada em ellipse
centralizar (500 Alt. x 300 Larg.) a imagem e contornar
o efeito.
-Selections > Invert > Delete
Select > None

10-
Image > Resize 90%
11-Effects > User Defined Filter > Emboss_3
12- Effects > 3D Effects > Drop Shadow > 4/4/70/30
"Reserve esta layer até o final do trabalho"
13- Nova Layer > Arrange= Send to Bottom > Repita o Item
1.
14- Abrir um Misted de sua escolha - Edit > Copy
15- Selections > Select All
Edit > Paste > Paste Into Selection no misted escolhido.
Selections > Select None
16- Effects > Image Effects > Seamless Tiling > Default
17-Adjust > Blur > Gaussian Blur > 20,00
18- Effects > Art Media Effects > Brush Stroks
25/53/20/0/20/40/350
19- Sharpen More
20- Duplicate Layer, feche a visibilidade da raster 2
21- Na cópia da layer aplique o Plugin Muras Meister >
Perspective Tiling > 80/0/0/25/0/0/100/255
22- Com o magic wand selecione a parte transparente,
Selection Modify > inside/outside feather > Outside 25
Delete 4 vzs > Select None. Volte a visibilidade das
layers
23- Copie seu Misted como nova layer - posicione ao seu
gosto.
24- Insira seu tube usando Drop shadow de sua
preferência.
25- Merge Visible
26- Image > Canvas Size com as seguintes configurações:
Width= 1000 e Height= 650
Bottom= 50 / Top, Left e Right= 0
27- Layers > New Raster Layer
Layers > Arrange > Send to Bottom
Preencha com uma cor capturada do seu trabalho.
28- Na layer Merged faça uma barrinha confeccionada com
a ferramenta selection tool
em retângulo - preencha com gradiente, use Inner Bevel.
Select None.
29- Drop Shadow a gosto.
30- Layers > Merge > Merge All
31- Assine e salve em jpeg.
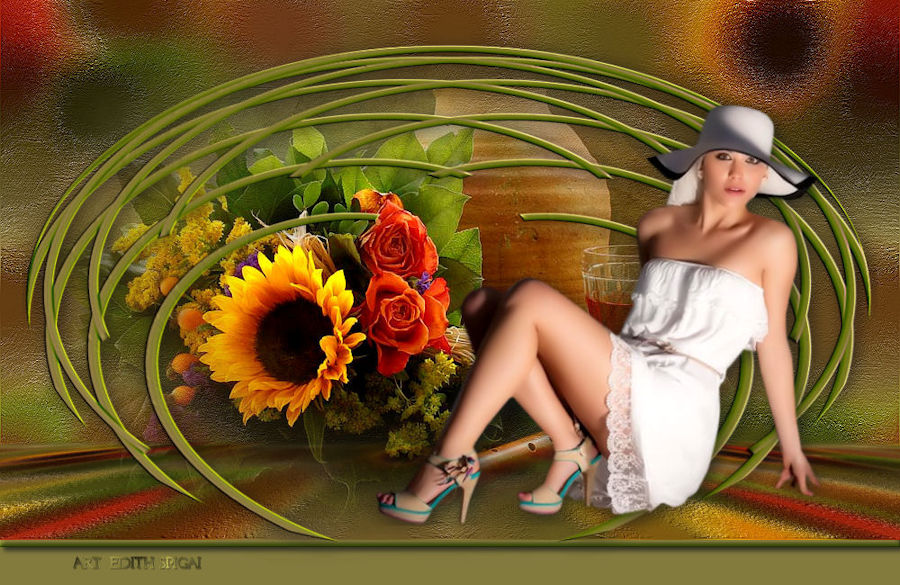
32- Formate e decore seu top a gosto.
** Tutorial criado em 18/03/2014 por Edith Spigai **
São Paulo=SP

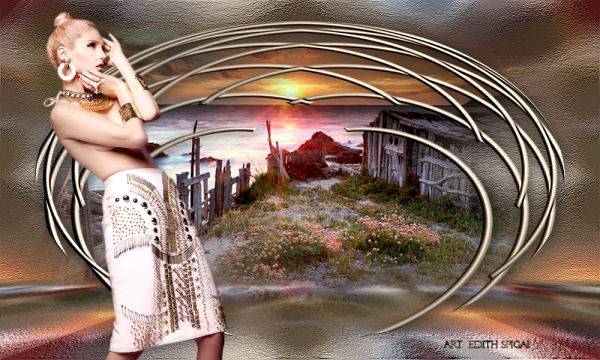
Créditos:
Tubs: By Nara Pamplona
Misted: K@rine / Dani@
Art e Formatação: EdithSpigai
 |