|
 
TAG MY
50 SHADES OF GREY

Material
-PSP_9 effects
Plugin Flaming Pear > Flexify 2
Instructions

Use the little arrow to mark your line
Click it and drag it wherever you like
|
|
1- Open a new 900 x 600 image
2- Fill it with a Linear gradient - Angle 0 / Repeats
1 - invert unchecked
in the colors of your work.
3- Select All and paste into selection the chosen tube >
select none.
4- Effects > Image Effects > Seamless Tiling > Side by
Side.
5- Duplicate Layer and set the copy of the Layer aside.
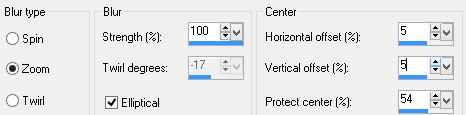
6- On raster 1 > Adjust > Radial Blur: 100/5/5/54 - Zoom
7-Effects
> Enhance More
(set raster 1 aside until the work is finished)
8- Go back to the copy of the Layer - Adjust > Gaussian Blur > 30
9- Plugin Flaming Pear > Flexify_2
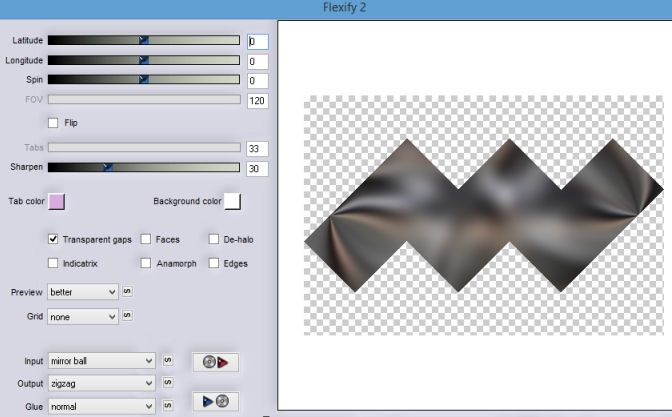
10- Drop
Shadow > 4/4/86/8 - repeat in negative
11- Duplicate this layer > resize 80%
12- Layers > Merge Down
13- With the move tool bring this layer to the
bottom part > as in the print
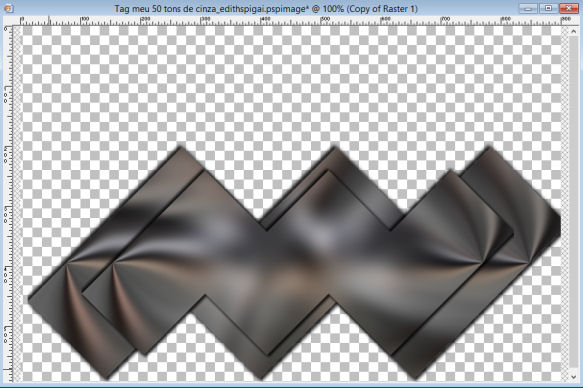
14-
Duplicate Layer - Image > Flip
15- Image > Mirror
16- Layers > Merge Down
17- Image > Resize > 80%
18- Apply your tube and your embellishments as you like.
19- Go back to raster 1 > Edit Copy
20- Layers - Merge Visible
21- Image resize > 90% - All Layers unchecked.
22- Select the transparent part with the Magic Wand.
23- Edit > Paste into selection
24- Selections > Invert and apply 4/4/86/43 - repeat in
negative
25- Image > Add Borders 5 px in the dark color.
26-Layers > Merge > Merge All
27- Sign it and save as jpeg.
Tutorial created in SP-15/03/2015 by Edith Spigai
Credits:
Tubes: Ana Ridzi/Ket_México
Embellishments: By Ivnne/Moo
Art and Creation: EdithSpigai
Copyright ©2016/2026 - Web Design - NaiseM®
 |